Thanks to fellow malaysia-rc members i finally manage to fly it , even so with autolevel mode
just wanna share my quad copter flight video , yes i know the danger ..but i already yelled my brother that capture the video to keep distance
i am just curios how bad my quad vibrate ..so i just selotape my nokia C6-01 and pretend it was a go pro HD Cam hahaha...cross my finger if my hp is drop dead from above..yet crash due wrong CG ..lucky me it drop to big bush....yes it vibrate so much ..i will balancing prop and reduce vibrate once i get proper camera
warning, ...might be dizzy due wrong CG ..the quad spinning itself

Monday, 14 January 2013

Sunday, 13 January 2013
Installing Papago X5 for Android Tablets n Phones
For newer phones like the Samsung Galaxy S2 and Note the NaviSEA folder must be in the phone main memory. - 20120124
Installing Papago X5 for Android Tablets n Phones.
With the surge in popularity of the Android O/S for portable devices in the GPS application we are certain that the trend will stay. This brief tutorial serve as a guide for those adventurous enough to try their hands on a new navigation platform. The Papago X5 is one of the popular navigation apk for the Android system. Here is how it can be installed.... enjoy.
1. - Down Papago x5 SG/MY from Papago Taiwan Site - All 5 files from Papago Taiwan
- Select My/Sg Installation.
- Download n Install Spare Parts from the Android Market. Spare Parts is an Android system parameters configuration program.
2. Unzip the Papago X5 rar files and you will have
- NaviSEA folder
- PAPAGO_X5SEA_0806_WWEMarket.apk
3. Copy the NaviSEA folder + PAPAGO_X5SEA_0806_WWEMarket.apk to your Android SD card root directory.
4. To match your screen resolution copy the nearest screen resolution (choose smaller than your screen size) of the installation
and paste it back to the same folder. Rename the copied folder to match your screen resolution.
eg.
Your screen resolution = 600x1024
Papago nearest screen resolution = 480X854
Copy and Paste the folder 480X854 into the same folder and rename it 600X1024. Do this for all folders in Organic and its sub-directories as follow:-
- X:\NaviSEA\Organic
- X:\NaviSEA\Organic\CHT
- X:\NaviSEA\Organic\EN
- X:\NaviSEA\Organic\IND
- X:\NaviSEA\Organic\MAL
5. Install the SD card onto your Android unit.
6. Turn On the Android browse and go to SD card Root directory (MyPad).
Please use Papago m8 instead of x5 for your Android as it is now obsoleted. MfM no longer publish x5 maps
For newer phones like the Samsung Galaxy S2 and Note the NaviSEA folder must be in the phone main memory. - 20120124
7. Double click PAPAGO_X5SEA_0806_WWEMarket.apk and choose Android Installer to install Papago X5.
8. Run Spare Parts and Tick/Check Compatibility Mode. This will re-size the display to Full Screen.
9. Power down the Android and Re-Boot. Spare Parts requires a re-boot for Compatibility Mode to take effect. Your unit may require different Spare Part setup. Google it if this doesn't work.
10. Run Papago X5 and select Trail to begin a journey of fun with Papago.
11. The downloaded Program files include the MfM map. Goto our map download section to get the latest Papago map.
12. If you find Papago X5 useful please go to the Android market to purchase it
Please use Papago m8 instead of x5 for your Android as it is now obsoleted. MfM no longer publish x5 maps
For newer phones like the Samsung Galaxy S2 and Note the NaviSEA folder must be in the phone main memory. - 20120124
By:- moeyhc/MfM NPM GG May 12, 2011
edited to add HTC Sensation link by Bro alf - 20110731
edited to add m8 replacement for x5 - 20111118
edited to add statement on newer Android phones installation - 20120124
Note: Update to this procedure will end when the M8/M9 is available.
Installing Papago X5 for Android Tablets n Phones.
With the surge in popularity of the Android O/S for portable devices in the GPS application we are certain that the trend will stay. This brief tutorial serve as a guide for those adventurous enough to try their hands on a new navigation platform. The Papago X5 is one of the popular navigation apk for the Android system. Here is how it can be installed.... enjoy.
1. - Down Papago x5 SG/MY from Papago Taiwan Site - All 5 files from Papago Taiwan
- Select My/Sg Installation.
- Download n Install Spare Parts from the Android Market. Spare Parts is an Android system parameters configuration program.
2. Unzip the Papago X5 rar files and you will have
- NaviSEA folder
- PAPAGO_X5SEA_0806_WWEMarket.apk
3. Copy the NaviSEA folder + PAPAGO_X5SEA_0806_WWEMarket.apk to your Android SD card root directory.
4. To match your screen resolution copy the nearest screen resolution (choose smaller than your screen size) of the installation
and paste it back to the same folder. Rename the copied folder to match your screen resolution.
eg.
Your screen resolution = 600x1024
Papago nearest screen resolution = 480X854
Copy and Paste the folder 480X854 into the same folder and rename it 600X1024. Do this for all folders in Organic and its sub-directories as follow:-
- X:\NaviSEA\Organic
- X:\NaviSEA\Organic\CHT
- X:\NaviSEA\Organic\EN
- X:\NaviSEA\Organic\IND
- X:\NaviSEA\Organic\MAL
5. Install the SD card onto your Android unit.
6. Turn On the Android browse and go to SD card Root directory (MyPad).
Please use Papago m8 instead of x5 for your Android as it is now obsoleted. MfM no longer publish x5 maps
For newer phones like the Samsung Galaxy S2 and Note the NaviSEA folder must be in the phone main memory. - 20120124
7. Double click PAPAGO_X5SEA_0806_WWEMarket.apk and choose Android Installer to install Papago X5.
8. Run Spare Parts and Tick/Check Compatibility Mode. This will re-size the display to Full Screen.
9. Power down the Android and Re-Boot. Spare Parts requires a re-boot for Compatibility Mode to take effect. Your unit may require different Spare Part setup. Google it if this doesn't work.
10. Run Papago X5 and select Trail to begin a journey of fun with Papago.
11. The downloaded Program files include the MfM map. Goto our map download section to get the latest Papago map.
12. If you find Papago X5 useful please go to the Android market to purchase it
Please use Papago m8 instead of x5 for your Android as it is now obsoleted. MfM no longer publish x5 maps
For newer phones like the Samsung Galaxy S2 and Note the NaviSEA folder must be in the phone main memory. - 20120124
By:- moeyhc/MfM NPM GG May 12, 2011
edited to add HTC Sensation link by Bro alf - 20110731
edited to add m8 replacement for x5 - 20111118
edited to add statement on newer Android phones installation - 20120124
Note: Update to this procedure will end when the M8/M9 is available.
Source from : My Asean Free Maps
credit to Author : MOEYHC
Thursday, 10 January 2013
Cheap KK2 and SK450 Quadcopter build experience
I am a little late to update my blog enty because I was busy preparing for my first quadcopter, I had a little experience when operating and flying quadcopter.
Recently i already flying the famous V929 mini quadcopter, yep the quad is quite tame and easy to fly , but after abuse playing , the toy quad shows sign that someday it will broken. I really enjoy flying it and learn to control orientation and fly it, nowadays i have already put some LED light for night flying ,

.. due to lack of budget, I bought a secondhand SK450 frame, motor, esc props from member that i contact from Malaysia Forum for price RM 200.00 .. he sent a quadcopter in parts to saving shipping cost and put all the motor, esc and frame in a one box, i dont mind because I really like to learning to build and install my own quad,

For my building progress and for reference i watch Youtube and forum2 RCGroups. Finally after 2 days installing, my quad successfully flown by using auto level mode
Recently i already flying the famous V929 mini quadcopter, yep the quad is quite tame and easy to fly , but after abuse playing , the toy quad shows sign that someday it will broken. I really enjoy flying it and learn to control orientation and fly it, nowadays i have already put some LED light for night flying ,
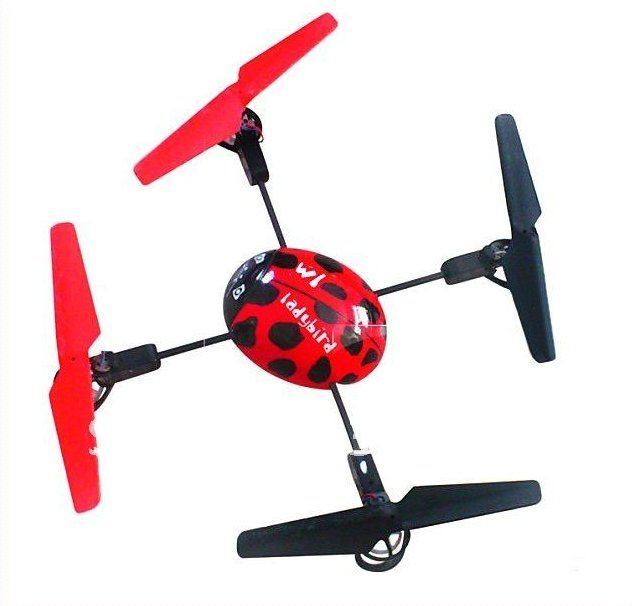
.. due to lack of budget, I bought a secondhand SK450 frame, motor, esc props from member that i contact from Malaysia Forum for price RM 200.00 .. he sent a quadcopter in parts to saving shipping cost and put all the motor, esc and frame in a one box, i dont mind because I really like to learning to build and install my own quad,

For my building progress and for reference i watch Youtube and forum2 RCGroups. Finally after 2 days installing, my quad successfully flown by using auto level mode
Monday, 7 January 2013
Kaysee RC World: The Hunter Becomes The Hunted
Kaysee RC World: The Hunter Becomes The Hunted: Our first working prototype of TTAH ROV - ROV1 has made its last dive last sunday @Taman Tasik Ampang Hilir after two days and 6 pack of ...
Thursday, 3 January 2013
What Is Variable Pitch Prop ?
A controllable pitch propeller (CPP) or variable pitch propeller is a type of propeller with blades that can be rotated around their long axis to change their pitch. If the pitch can be set to negative values, the reversible propeller can also create reverse thrust for braking or going backwards without the need of changing the direction of shaft revolutions - Source : Wikipedia
A simple one just like this video , see for yourself
Question: Do real plane use variable pitch prop ?
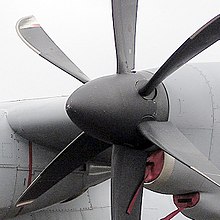
 Real planes DO use a variable pitch prop system but only for adjusting positive pitch level, never for negative.
But some turbine jets do have variable turbine blades too, that can turn negative to slow down the plane during landing.

Question: How to setting for my transmitter T9x?
As for how to adjust it, I can show you how it's done in a T9x. Remember when installing the servo, it must be centered, and the vpitch must be 0 pitch when servo arm is centered.
The servo for adjusting pitch, plugs into channel 6, the pitch channel in a heli setup.
You set the model type to Heli-1 which is a heli model with NO mixing of any servos.
Set your throttle curve like any heli, 0,25,50,75,100 for normal, and 100,100,100,100,100 for idle up.
Set pitch curve to 100,100,100,100,100 for normal, then 0,25,50,75,100 for idle up. Notice it's deliberately opposite, mimicking a real fix pitched prop in normal mode.
Then limit your servo travel endpoint to 30 percent max and min.
For the servo arm, use the 2nd closest hole to the servo screw center. This is to limit the throws, we don't want too much throws, but we need the torque and resolution.
Torque is strongest at servo hole closest to center, this so you have tons of torque to move the vpitch arm that is spinning. They require lotsa torque to turn, and I use a 10gram servo instead of 9g. 1.8-2kg torque servo should be enough.
During spool up, do it in normal mode, with a wattmeter. You MUST have a wattmeter if you plan to use a vpp system.
Spool up slowly, until the amps reached maximum rating for the esc and motor. For my unit, it should not exceed 20a.
If it reaches 20a before you're full stick, stop, then limit the servo travel to below 30 percent.
if it is unable to reach 20a (for my motor tolerance of amps, yours could be different), then increase servo travel to above 30 percent until you get it. You don't have to reach 20a, maybe a safe margin of 16 to 18a will do too. Remember to set same percent for the other end of servo throw too, both side throw should be identical during this time, since theoritically at full positive/negative with same percent they should draw same amount of amp.
Once that's done, flip to idle up mode while your throttle stick is in the center (0-pitch). Then throttle the stick up, to confirm amp draw.
If ok, then move throttle stick down slowly to negative, and observe the amp draw on the watt meter.
If negative full pitch matches the amps, you're done, if not, then adjust the other end of the servo travel to either above/below the percentage you currently have.
Walla, done. It's not easy, a lot of work, but the servo travel must be tuned/adjusted to prevent overamping the motor/esc or else you will fry them. Some people would just leave the servo travel and adjust only the pitch curve. The disadvantage is you also have to adjust the pitch curve in throttle hold mode or next time you change servo, you have to change more than one places. If I just do it at the servo endpoint, everything else will settle in place automatically.
Do not underestimate the servo travel min/max 30 percent travel and 2nd hole. That could be more than enough throw to get the pitch angle and exceed amps rating. We start at max and min 30 percent and 2nd hole to prevent killing the esc/motor. This is for safety base starting point.
For me, I failed to properly tune before the damn blades threw itself twice with less than 10 amps of load... stupid poor quality designed VPP crap from HK. It not only threw itself apart but also destroyed my profile foamy nose in the process, causing 2x repair job.
Source n credits to Bro Metalman -- :)
A simple one just like this video , see for yourself
Question: Do real plane use variable pitch prop ?

Question: How to setting for my transmitter T9x?
As for how to adjust it, I can show you how it's done in a T9x. Remember when installing the servo, it must be centered, and the vpitch must be 0 pitch when servo arm is centered.
The servo for adjusting pitch, plugs into channel 6, the pitch channel in a heli setup.
You set the model type to Heli-1 which is a heli model with NO mixing of any servos.
Set your throttle curve like any heli, 0,25,50,75,100 for normal, and 100,100,100,100,100 for idle up.
Set pitch curve to 100,100,100,100,100 for normal, then 0,25,50,75,100 for idle up. Notice it's deliberately opposite, mimicking a real fix pitched prop in normal mode.
Then limit your servo travel endpoint to 30 percent max and min.
For the servo arm, use the 2nd closest hole to the servo screw center. This is to limit the throws, we don't want too much throws, but we need the torque and resolution.
Torque is strongest at servo hole closest to center, this so you have tons of torque to move the vpitch arm that is spinning. They require lotsa torque to turn, and I use a 10gram servo instead of 9g. 1.8-2kg torque servo should be enough.
During spool up, do it in normal mode, with a wattmeter. You MUST have a wattmeter if you plan to use a vpp system.
Spool up slowly, until the amps reached maximum rating for the esc and motor. For my unit, it should not exceed 20a.
If it reaches 20a before you're full stick, stop, then limit the servo travel to below 30 percent.
if it is unable to reach 20a (for my motor tolerance of amps, yours could be different), then increase servo travel to above 30 percent until you get it. You don't have to reach 20a, maybe a safe margin of 16 to 18a will do too. Remember to set same percent for the other end of servo throw too, both side throw should be identical during this time, since theoritically at full positive/negative with same percent they should draw same amount of amp.
Once that's done, flip to idle up mode while your throttle stick is in the center (0-pitch). Then throttle the stick up, to confirm amp draw.
If ok, then move throttle stick down slowly to negative, and observe the amp draw on the watt meter.
If negative full pitch matches the amps, you're done, if not, then adjust the other end of the servo travel to either above/below the percentage you currently have.
Walla, done. It's not easy, a lot of work, but the servo travel must be tuned/adjusted to prevent overamping the motor/esc or else you will fry them. Some people would just leave the servo travel and adjust only the pitch curve. The disadvantage is you also have to adjust the pitch curve in throttle hold mode or next time you change servo, you have to change more than one places. If I just do it at the servo endpoint, everything else will settle in place automatically.
Do not underestimate the servo travel min/max 30 percent travel and 2nd hole. That could be more than enough throw to get the pitch angle and exceed amps rating. We start at max and min 30 percent and 2nd hole to prevent killing the esc/motor. This is for safety base starting point.
For me, I failed to properly tune before the damn blades threw itself twice with less than 10 amps of load... stupid poor quality designed VPP crap from HK. It not only threw itself apart but also destroyed my profile foamy nose in the process, causing 2x repair job.
Source n credits to Bro Metalman -- :)
Wednesday, 2 January 2013
REMAIDEN ESKY Nemo EPP Plane..
Hi ... last week, my fellow friend from Wetland Putrajaya gave me some second-hand aircraft. The condition of the aircraft can be flown again but it look so ugly and had many glue marker from previous crash .. anyway i accept the plane after seeing my fellow fried brough from Kuala Lumpur
Among the ships that I got from my friend is Yak 54 EPP, Esky Airplane NEMO and Thailand homemade airplane.
For Esky NEMO the condition is much worse .. I tried to reshape and tape it with coating color and installed power system .. the result as below

I think the tail section really shows that my plane is really esky Nemo epp plane

Dear fellow reader please pray hope for me, may my remaiden Esky Nemo will be successful
Tuesday, 1 January 2013
EastBay RC: er9x Tutorial: Mixing (good for Turnigy 9xr)
EastBay RC: er9x Tutorial: Mixing (good for Turnigy 9xr): Here's some notes to go along with the tutorial/video for er9x mixing. Some people have said that they thought er9x was more complicated th...
Subscribe to:
Posts (Atom)

Popular Posts
-
 Hello .. This time I would like to make a short review on TMnet Unifi. This article will cover about the installation, list of device, pr...
 -
Finally after several weeks and days reading from RC Groups forum, i finally decided to convert my main motor to brushless one, i know its o...
-
Today i wanna replace my MIG29 profile that had crashed and smashed to ground. I wanna fly different kind of r/c jetplane so i choose a new...
-
For newer phones like the Samsung Galaxy S2 and Note the NaviSEA folder must be in the phone main memory. - 20120124 Installing Papa...
-
 Continue from part 1 To build a blu-baby R/C airplane require many item and electronic such as 1. 2 Sheets foamboard - Can get from loca...
 -
I am a little late to update my blog enty because I was busy preparing for my first quadcopter, I had a little experience when operating a...
-
After sometimes flying 450 size quadcopter i really satisfied with its performance, no jello and working perfect with APM flight controller....
-
 Now i already combine two fuselage with the monobloc and glue it with hot glue. After that setting up the elevator and rudder and make sure ...
 -
 I say after so many experience i had in build multirotor from KK2 , Multiwii and finally APM 2.5, i found it APM 2.5 is a most easy and n...


