A simple one just like this video , see for yourself
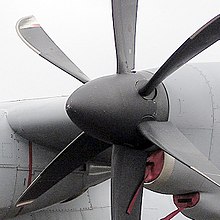
Question: Do real plane use variable pitch prop ?

Question: How to setting for my transmitter T9x?
As for how to adjust it, I can show you how it's done in a T9x. Remember when installing the servo, it must be centered, and the vpitch must be 0 pitch when servo arm is centered.
The servo for adjusting pitch, plugs into channel 6, the pitch channel in a heli setup.
You set the model type to Heli-1 which is a heli model with NO mixing of any servos.
Set your throttle curve like any heli, 0,25,50,75,100 for normal, and 100,100,100,100,100 for idle up.
Set pitch curve to 100,100,100,100,100 for normal, then 0,25,50,75,100 for idle up. Notice it's deliberately opposite, mimicking a real fix pitched prop in normal mode.
Then limit your servo travel endpoint to 30 percent max and min.
For the servo arm, use the 2nd closest hole to the servo screw center. This is to limit the throws, we don't want too much throws, but we need the torque and resolution.
Torque is strongest at servo hole closest to center, this so you have tons of torque to move the vpitch arm that is spinning. They require lotsa torque to turn, and I use a 10gram servo instead of 9g. 1.8-2kg torque servo should be enough.
During spool up, do it in normal mode, with a wattmeter. You MUST have a wattmeter if you plan to use a vpp system.
Spool up slowly, until the amps reached maximum rating for the esc and motor. For my unit, it should not exceed 20a.
If it reaches 20a before you're full stick, stop, then limit the servo travel to below 30 percent.
if it is unable to reach 20a (for my motor tolerance of amps, yours could be different), then increase servo travel to above 30 percent until you get it. You don't have to reach 20a, maybe a safe margin of 16 to 18a will do too. Remember to set same percent for the other end of servo throw too, both side throw should be identical during this time, since theoritically at full positive/negative with same percent they should draw same amount of amp.
Once that's done, flip to idle up mode while your throttle stick is in the center (0-pitch). Then throttle the stick up, to confirm amp draw.
If ok, then move throttle stick down slowly to negative, and observe the amp draw on the watt meter.
If negative full pitch matches the amps, you're done, if not, then adjust the other end of the servo travel to either above/below the percentage you currently have.
Walla, done. It's not easy, a lot of work, but the servo travel must be tuned/adjusted to prevent overamping the motor/esc or else you will fry them. Some people would just leave the servo travel and adjust only the pitch curve. The disadvantage is you also have to adjust the pitch curve in throttle hold mode or next time you change servo, you have to change more than one places. If I just do it at the servo endpoint, everything else will settle in place automatically.
Do not underestimate the servo travel min/max 30 percent travel and 2nd hole. That could be more than enough throw to get the pitch angle and exceed amps rating. We start at max and min 30 percent and 2nd hole to prevent killing the esc/motor. This is for safety base starting point.
For me, I failed to properly tune before the damn blades threw itself twice with less than 10 amps of load... stupid poor quality designed VPP crap from HK. It not only threw itself apart but also destroyed my profile foamy nose in the process, causing 2x repair job.
Source n credits to Bro Metalman -- :)


No comments:
Post a Comment